Are you looking to dive into the world of web development using ASP.NET Core MVC but feeling overwhelmed by Entity Framework Core? Fear not! In this tutorial, we’ll build a simple yet functional web application using ASP.NET Core MVC without the complexities of EF Core. We will create a simple ASP.NET Core MVC application using an empty project template, allowing you to grasp the fundamentals of MVC architecture without the clutter. By the end of this guide, you’ll have a solid understanding of MVC architecture and how to manage data using a straightforward approach.
Note: You can also download the code for this guide from my Github link. Project name is “MVCLearningProject”
What You Will Learn
- Setting up an ASP.NET Core MVC project
- Creating models, views, and controllers : MVC Pattern
- Render HTML with views and partial views
- Passing data and parameters to action methods and handling requests with controllers.
- Managing data with a simple in-memory repository
- Performing CRUD operations
Prerequisites
Before we start, please ensure you have the following installed:
- Visual Studio 2022 (or any other .NET-compatible IDE)
- .NET SDK (version 8.0 or later)
Step 1: Create an Empty ASP.NET Core Project
- Open Visual Studio and select Create a new project.
- Search for ASP.NET Core Empty and click Next.
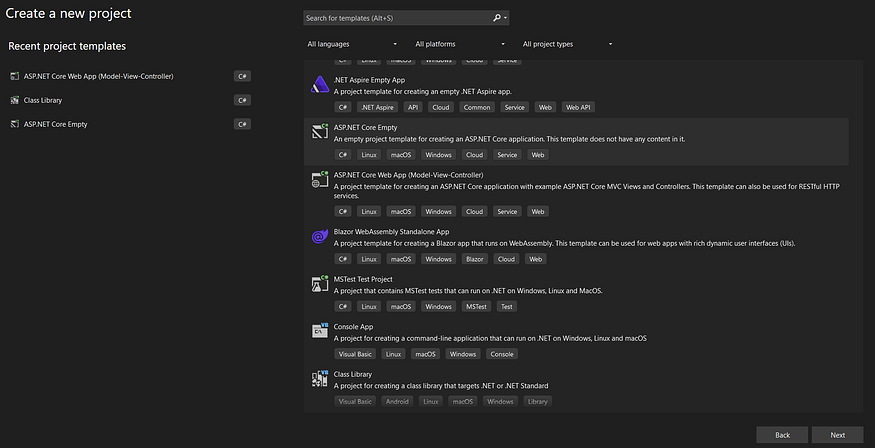
3. Name your project (e.g., MyEmptyMvcApp) and click Create.
4. In the next dialog, select Empty as your project template. Ensure Enable Docker Support is unchecked and Configure for HTTPS is checked. Click Create.
Step 2: Add Required NuGet Packages
Since we started with an empty project, we need to add the necessary MVC packages. Right-click on your project in Solution Explorer and select Manage NuGet Packages. Search for and install the following packages:
- Microsoft.AspNetCore.Mvc
- Microsoft.AspNetCore.Razor.Design (for Razor view compilation)
Step 3: Set Up the MVC Structure
Create the necessary folders and files to organize your MVC application:
- In the project root, create the following folders: Controllers.
- Creating home controller : In the Controllers folder, create a new controller. Right click on the controllers folder and select Add new controller and select “MVC Controller — Empty” and name it as “HomeController.cs”. You will see a new controller class named HomeController will be added derived from controller base class. It will be having a default method created which is called Index, a public method. This usually called a action method. Any action method is used to handle requests , when a request comes into a server it will be mapped to one of the controller’s action methods.
using Microsoft.AspNetCore.Mvc;

namespace MVCLearningProject.Controllers
{
    public class HomeController : Controller
    {
        public IActionResult Index()
        {
            return View();
        }

    }
}
3. Right click on the index method and create a new view named “Index.cshtml” for the same action method and add the below html
<!DOCTYPE html>
<html>
<body>
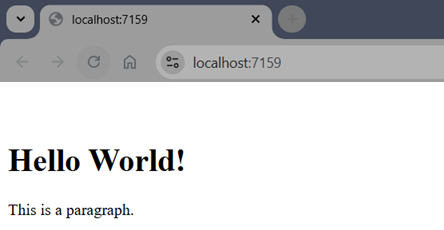
<h1>Hello World!</h1>
<p>This is a paragraph.</p>
</body>
</html>
A new folder called “Home” will be generated and inside this , your newly created Index.cshtml file will be added.
Note: As this will be the home page so no model is required for this one.
Step 4: Configure MVC in Program.cs
Open Program.cs and update the ConfigureServices and Configure methods to set up MVC:
using Microsoft.AspNetCore.Mvc.Formatters;
using System.Net.Mime;
using System.Text;

var builder = WebApplication.CreateBuilder(args);
builder.Services.AddControllersWithViews();

var app = builder.Build();
app.UseStaticFiles();

app.UseRouting();

app.MapControllerRoute(
    name: "default",
    pattern:"{controller=Home}/{action=Index}/{id?}");
app.Run();
Step 5: Run Your Application
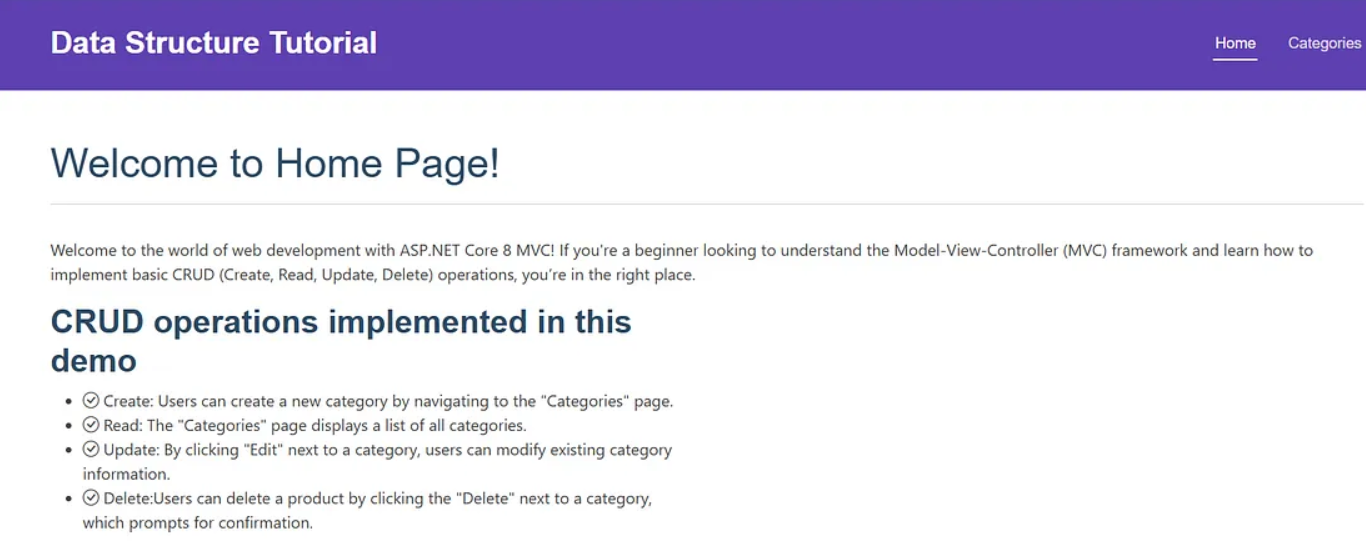
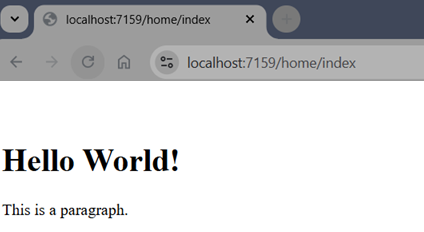
Now that we have everything set up, run your application by pressing F5 or clicking the Start button. You should see a basic Home page now with the text . If you add “home/index” on the url, same view will be loaded. Your index page will be rendered with the text “Hello world”. Congratulations! You have rendered your first page. Now let’s implement additional features to understand the communication of model, view and controller.
Step 6: Implement Crud Operations for Category
Now in this tutorial we are going to create category management simple MVC app where we have different type of categories, I have taken an example of Data Structure Categories, where we can create, edit, delete and add data structure categories.
Step 6.1 Create the Category Model
Let’s create a simple model to represent a category with properties like CategoryId, Name and Description. Inside the Models folder, create a file named Category.cs:
using System.ComponentModel.DataAnnotations;

namespace MVCLearningProject.Models
{
    public class Category
    {
        public int CategoryId { get; set; }
        [Required]
        public string Name { get; set; } = string.Empty;
        public string? Description { get; set; } = string.Empty;
    }
}
Step 6.1 Create an In-Memory Data Repository
To manage our products, we will create a simple in-memory data repository. Create a new folder named Data and add a file named CategoriesRepository.cs:
using System.Net;

namespace MVCLearningProject.Data
{
    public static class CategoriesRepository
    {
        private static List<Category> _categories = new List<Category>()
            {
            new Category{CategoryId = 1, Name="Trees", Description="Tree data structure"},
            new Category{CategoryId = 2, Name="Graphs", Description="Graph data structure"},
            new Category{CategoryId = 3, Name="Arrays", Description="Array data structure"}
            };
        public static void AddCategory(Category category)
        {
            var nextID = _categories.Max(c => c.CategoryId);
            category.CategoryId = nextID + 1;
            _categories.Add(category);
        }

        public static List<Category> GetCategories() => _categories;
        public static Category? GetCategory(int categoryId)
        {
            var category = _categories.FirstOrDefault(x => x.CategoryId == categoryId);
            if(category !=null)
            {
                return new Category
                {
                    CategoryId = category.CategoryId,
                    Name = category.Name,
                    Description = category.Description,
                };
            }
            return null;

        }
        public static void UpdateCategory(int categoryId, Category category)
        {
            if (categoryId != category.CategoryId)
                return;
            var categoryToUpdate = _categories.FirstOrDefault(category => category.CategoryId == categoryId);
            if (categoryToUpdate !=null)
            {
                categoryToUpdate.Name = category.Name;
                categoryToUpdate.Description = category.Description;
            }
        }

        public static void DeleteCategory(int categoryId)
        {
            var category = _categories.FirstOrDefault(x => x.CategoryId == categoryId);
            if (category != null)
            {
                _categories.Remove(category);
            }
        }
    }
}
Step 6.3: Create the Categories Controller
Now, let’s create a controller to handle product-related actions. Create an empty controller named CategoriesController in the Controllers folder and add the below code :
using Microsoft.AspNetCore.Mvc;
using MVCLearningProject.Models;
using MVCLearningProject.Data;

namespace MVCLearningProject.Controllers
{
    public class CategoriesController : Controller
    {
        public IActionResult Index()
        {
            var categories = CategoriesRepository.GetCategories();
            return View(categories);
        }
        public IActionResult Edit(int? id)
        {
            ViewBag.Action = "Edit";
           var category = CategoriesRepository.GetCategory(id.HasValue ? id.Value : 0);
           return View(category);
        }
        [HttpPost]
        public IActionResult Edit(Category category)
        {
            if (ModelState.IsValid)
            {
                CategoriesRepository.UpdateCategory(category.CategoryId, category);
                return RedirectToAction(nameof(Index));
            }
            return View(category);
        }

        public IActionResult Add()
        {
            ViewBag.Action = "Add";
            return View();
        }
        [HttpPost]
        public IActionResult Add(Category category)
        {
            if (ModelState.IsValid)
            {
                CategoriesRepository.AddCategory(category);
                return RedirectToAction(nameof(Index));
            }
            return View(category);
        }
        public IActionResult Delete(int categoryId)
        {
            CategoriesRepository.DeleteCategory(categoryId);
            return RedirectToAction(nameof(Index));
        }
    }
}
Step 6.4: Create Views for the Categories Controller
Now let’s create the views that correspond to our category controller actions. Under the Views folder, create a new folder named “Shared” and create a new layout file named “_layout.cshtml” and add the below code. You can add the bootstrap files from my github link .
<!DOCTYPE html>
<html lang="en">
<head>
    <meta charset="utf-8">
    <meta content="width=device-width, initial-scale=1.0" name="viewport">
    <title>Data Structure Tutorial</title>
    <meta name="description" content="">
    <meta name="keywords" content="">
    <!-- Vendor CSS Files -->
    <link href="~/template/vendor/bootstrap/css/bootstrap.min.css" rel="stylesheet">
    <link href="~/template/vendor/bootstrap-icons/bootstrap-icons.css" rel="stylesheet">

    <!-- Main CSS File -->
    <link href="~/template/css/main.css" rel="stylesheet">

</head>
<body class="index-page">
    <header id="header" class="header d-flex align-items-center" style="--background-color: rgba(77, 44, 169, 0.9);">
        <div class="container-fluid container-xl position-relative d-flex align-items-center">
            <a class="logo d-flex align-items-center me-auto" asp-area="" asp-controller="Home" asp-action="Index">
                <h1 class="sitename">Data Structure Tutorial</h1>
            </a>

            <nav id="navmenu" class="navmenu">
                <ul>
                    <li>
                        <a asp-controller="Home" asp-action="index" class="active">Home</a>
                    </li>
                    <li>
                        <a asp-controller="Categories" asp-action="index">Categories</a>
                    </li>

                </ul>
                <i class="mobile-nav-toggle d-xl-none bi bi-list"></i>
            </nav>
        </div>
    </header>
    <div class="container container mt-5">
        <div class="pb-3">
            @RenderSection("title")
            <hr />
        </div>
        <div>
            @RenderBody()
        </div>
    </div>
    @await RenderSectionAsync("Scripts", required: false)

</body>
</html>
Role of _layout.cshtml file
But before we add any html in our views for crud operations, let’s take care of the layout of our views. For every crud operation each file will have a full html markup. Usually in an application we have one or may be two different layouts and every page follow the same layout.
In ASP.NET Core, the layout.cshtml file serves as a template for your web application’s layout. It allows you to define a consistent structure for your web pages, including elements like headers, footers, and navigation menus, which you can reuse across different views.
Key Features of layout.cshtml:
- HTML Structure: It typically contains the main HTML structure of your site.
- @RenderBody(): This is a placeholder where the content of the individual views will be injected. Each view that uses this layout can define its own content, which gets rendered in place of @RenderBody().
- Using Sections: If you want to define specific parts that might change depending on the view (like scripts or additional styles), you can use @RenderSectionAsync(“Scripts”, required: false) and @RenderSection(“title”).
And in your view, you can define this section
Overall, layout.cshtml is crucial for maintaining a unified look and feel across your ASP.NET Core application, helping to avoid code duplication and promote cleaner structure.
You can add _layout.cshtml on each view as below :

But the problem with this approach is that you must include this in all your views. Other way around is that you can adda _ViewStart.cshtml file inside views folder and add the above code in this file. Before rendering every view this _ViewStart.cshtml file is rendered.
Role of partial views
Under the Views folder, create a new folder named Category. Inside the Category folder, create a partial view “_Category.cshtml” and add the below code
@model Category
@{
    string action = ViewBag.Action ?? string.Empty;
}
<form method="post" asp-controller="categories" asp-action="@action">
    @if(action?.ToLower() == "edit")
    {
        <input type="hidden" asp-for="CategoryId" />
    }

    <div class="text-danger" asp-validation-summary="All"></div>
    <div class="row mb-3">
        <div class="col-2">
            <label asp-for="Name" class="col-form-label"></label>
        </div>
        <div class="col-6">
            <input type="text" asp-for="Name" class="form-control" />
        </div>
        <div class="col">
            <span class="text-danger" asp-validation-for="Name"></span>
        </div>
    </div>
    <div class="row mb-3">
        <div class="col-2">
            <label asp-for="Description" class="col-form-label"></label>
        </div>
        <div class="col-6">
            <input type="text" asp-for="Description" class="form-control" />
        </div>
    </div>
    <div class="row mb-3">
        <div class="col-2">
            <input type="submit" class="btn btn-primary" value="Save" />
            <a asp-controller="categories" asp-action="index" class="btn btn-primary">
                Back to List
            </a>
        </div>
        <div class="col-6">
        </div>
    </div>
</form>
Partial views in C# ASP.NET MVC are reusable components that allow developers to encapsulate a section of a view into a separate file. This approach promotes cleaner code, enhances maintainability, and facilitates a modular design for web applications.
Key Features of Partial Views:
- Reusability: Partial views can be used across multiple views, reducing code duplication. For example, a navigation bar or a footer can be defined once and included wherever needed.
- Separation of Concerns: By breaking down complex views into smaller, manageable parts, partial views help maintain a clean separation of concerns, making it easier to test and update individual components without affecting the entire view.
- Dynamic Content: Partial views can be rendered with dynamic data, allowing them to adapt based on the context in which they are used. This is particularly useful for sections that display different content based on user interactions or specific data sets.
- Enhanced Performance: When rendering a large view, using partial views can optimize performance by allowing the server to send only the necessary HTML for specific parts instead of the entire page.
This newly created “_Category.cshtml” partial view will then can be added to the add and edit views .
Create views against the controller actions
Next, we need to create views for displaying our categories. Inside the Category folder add three Razor views (Empty) : Index.cshtml , Add.cshtml , edit.cshtml . C
Index.cshtml
@model List<Category>
@using MVCLearningProject.Models;
@section title {
<h3>Manage Categories</h3>
}
@if(Model !=null && Model.Count()>0)
{
<table class="table table-striped">
<thead>
<tr>
<th>Name</th>
<th>Description</th>
<th></th>
<th></th>
</tr>
</thead>
<tbody>
@foreach(var category in Model)
{
<tr>
<td>@category.Name</td>
<td>@category.Description</td>
<td><a class="btn btn-link" asp-controller="categories" asp-action="edit" asp-route-id="@category.CategoryId"> Edit</a></td>
<td><a class="btn btn-link" asp-controller="categories" asp-action="delete" asp-route-categoryId="@category.CategoryId" onclick="return confirmDelete()"> Delete</a></td>
</tr>
}
</tbody>
</table>
<div class="row mb-3">
<div class="col-2">
<a class="btn btn-primary" asp-controller="categories" asp-action="add"> Add</a>
</div>
<div class="col-6">
</div>
</div>
}
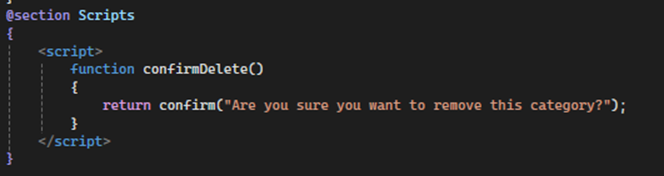
@section Scripts
{
<script>
function confirmDelete()
{
return confirm("Are you sure you want to remove this category?");
}
</script>
}
Add.cshtml
@model Category
@section title {

    <h3>Add Category</h3>
}
<partial name="_Category" model="@Model" />
Edit.cshtml
@model Category
@section title {
    @if(Model!=null)
    {
        <h3>Category: @Model.Name</h3>
    }

}
<partial name="_Category" model="@Model" />
Run Your Application again as mentioned in step 5
Conclusion
Congratulations! You’ve built your first ASP.NET Core MVC application without using EF Core. This guide showed you how to create a simple in-memory data store, define models, create a controller, and set up views.
While EF Core is a powerful tool for data access, understanding how to build an application without it gives you flexibility and a deeper understanding of the MVC pattern. From here, you can expand your application by adding features like delete form for deleting the category( I have already added a link of delete on Views/categories/Index.cshtml page), implementing client-side validations, or integrating with an actual database.
Happy coding!
GitHub Repo Link : MVCLearningProject